Pages

Monday, 11 September 2023

How To Make Kombucha Tea at Home

MAKES

about 1 gallon/3.79 liter

There are 4.55 Litres in 1 UK Gallon.


INGREDIENTS

  • 3 1/2 quarts water/A quart and a liter are similar in size/UK 1136.52 mL
  • 1 cup sugar (regular granulated sugar works best)
  • 8 bags black tea, green tea, or a mix (or 2 tablespoons loose tea)
  • 2 cups starter tea from last batch of kombucha or store-bought kombucha (unpasteurized, neutral-flavored)
  • 1 scoby per fermentation jar, homemade or purchased online

OPTIONAL FLAVORING EXTRAS FOR BOTTLING

  • 1 to 2 cups chopped fruit
  • 2 to 3 cups fruit juice
  • 1 to 2 tablespoons flavored tea (like hibiscus or Earl Grey)
  • 1/4 cup honey
  • 2 to 4 tablespoons fresh herbs or spices

EQUIPMENT

  • Stock pot
  • 1-gallon glass jar/3.7L or two 2-quart glass jars
  • Tightly woven cloth (like clean napkins or tea towels), coffee filters, or paper towels, to cover the jar
  • Bottles: Six 16-oz/473 mL glass bottles with plastic lids, swing-top bottles, or clean soda bottles
  • Small funnel

INSTRUCTIONS

  • Note: Avoid prolonged contact between the kombucha and metal both during and after brewing. This can affect the flavor of your kombucha and weaken the scoby over time.
  • 1. Make the tea base: 
  • Bring the water to a boil. 
  • Remove from heat and stir in the sugar to dissolve. Drop in the tea and allow it to steep until the water has cooled. Depending on the size of your pot, this will take a few hours. You can speed up the cooling process by placing the pot in an ice bath.
  • 2. Add the starter tea: Once the tea is cool, remove the tea bags or strain out the loose tea. Stir in the starter tea. (The starter tea makes the liquid acidic, which prevents unfriendly bacteria from taking up residence in the first few days of fermentation.)
  • 3. Transfer to jars and add the scoby: Pour the mixture into a 1-gallon glass jar (or divide between two 2-quart jars, in which case you'll need 2 scobys) and gently slide the scoby into the jar with clean hands. Cover the mouth of the jar with a few layers tightly-woven cloth, coffee filters, or paper towels secured with a rubber band. (If you develop problems with gnats or fruit flies, use a tightly woven cloth or paper towels, which will do a better job keeping the insects out of your brew.)
  • Ferment for 7 to 10 days: Keep the jar at room temperature, out of direct sunlight, and where it won't get jostled. Ferment for 7 to 10 days, checking the kombucha and the scoby periodically.
  • It's not unusual for the scoby to float at the top, bottom, or even sideways during fermentation. A new cream-colored layer of scoby should start forming on the surface of the kombucha within a few days. It usually attaches to the old scoby, but it's ok if they separate. You may also see brown stringy bits floating beneath the scoby, sediment collecting at the bottom, and bubbles collecting around the scoby. This is all normal and signs of healthy fermentation.
  • After 7 days, begin tasting the kombucha daily by pouring a little out of the jar and into a cup. When it reaches a balance of sweetness and tartness that is pleasant to you, the kombucha is ready to bottle.
  • Remove the scoby: Before proceeding, prepare and cool another pot of strong tea for your next batch of kombucha, as outlined above. With clean hands, gently lift the scoby out of the kombucha and set it on a clean plate. As you do, check it over and remove the bottom layer if the scoby is getting very thick.
  • Bottle the finished kombucha: Measure out your starter tea from this batch of kombucha and set it aside for the next batch. Pour the fermented kombucha (straining, if desired) into bottles using the small funnel, along with any juice, herbs, or fruit you may want to use as flavoring. Leave about a half inch of head room in each bottle. (Alternatively, infuse the kombucha with flavorings for a day or two in another covered jar, strain, and then bottle. This makes a cleaner kombucha without "stuff" in it.)
  • Carbonate and refrigerate the finished kombucha: Store the bottled kombucha at room temperature out of direct sunlight and allow 1 to 3 days for the kombucha to carbonate. Until you get a feel for how quickly your kombucha carbonates, it's helpful to keep it in plastic bottles; the kombucha is carbonated when the bottles feel rock solid. Refrigerate to stop fermentation and carbonation, and then consume your kombucha within a month.
  • Make a fresh batch of kombucha: Clean the jar being used for kombucha fermentation. Combine the starter tea from your last batch of kombucha with the fresh batch of sugary tea, and pour it into the fermentation jar. Slide the scoby on top, cover, and ferment for 7 to 10 days.

RECIPE NOTES

  • Covering for the jar: Cheesecloth is not ideal because it's easy for small insects, like fruit flies, to wiggle through the layers. Use a few layers of tightly woven cloth (like clean napkins or tea towels), coffee filters, or paper towels, to cover the jar, and secure it tightly with rubber bands or twine.
  • Batch Size: To increase or decrease the amount of kombucha you make, maintain the basic ratio of 1 cup of sugar, 8 bags of tea, and 2 cups starter tea per gallon batch. One scoby will ferment any size batch, though larger batches may take longer.
  • Putting Kombucha on Pause: If you'll be away for 3 weeks or less, just make a fresh batch and leave it on your counter. It will likely be too vinegary to drink by the time you get back, but the scoby will be fine. For longer breaks, store the scoby in a fresh batch of the tea base with starter tea in the fridge. Change out the tea for a fresh batch every 4 to 6 weeks.
  • Other Tea Options: Black tea tends to be the easiest and most reliable for the scoby to ferment into kombucha, but once your scoby is going strong, you can try branching out into other kinds. Green tea, white tea, oolong tea, or a even mix of these make especially good kombucha. Herbal teas are okay, but be sure to use at least a few bags of black tea in the mix to make sure the scoby is getting all the nutrients it needs. Avoid any teas that contain oils, like earl grey or flavored teas.
  • Avoid Prolonged Contact with Metal: Using metal utensils is generally fine, but avoid fermenting or bottling the kombucha in anything that brings them into contact with metal. Metals, especially reactive metals like aluminum, can give the kombucha a metallic flavor and weaken the scoby over time.

Troubleshooting Kombucha

  • It is normal for the scoby to float on the top, bottom, or sideways in the jar. It is also normal for brown strings to form below the scoby or to collect on the bottom. If your scoby develops a hole, bumps, dried patches, darker brown patches, or clear jelly-like patches, it is still fine to use. Usually these are all indicative of changes in the environment of your kitchen and not a problem with the scoby itself.
  • Kombucha will start off with a neutral aroma and then smell progressively more vinegary as brewing progresses. If it starts to smell cheesy, rotten, or otherwise unpleasant, this is a sign that something has gone wrong. If you see no signs of mold on the scoby, discard the liquid and begin again with fresh tea. If you do see signs of mold, discard both the scoby and the liquid and begin again with new ingredients.
  • A scoby will last a very long time, but it's not indestructible. If the scoby becomes black, that is a sign that it has passed its lifespan. If it develops green or black mold, it is has become infected. In both of these cases, throw away the scoby and begin again.
  • To prolong the life and maintain the health of your scoby, stick to the ratio of sugar, tea, starter tea, and water outlined in the recipe. You should also peel off the bottom (oldest) layer every few batches. This can be discarded, composted, used to start a new batch of kombucha, or given to a friend to start their own.
  • If you're ever in doubt about whether there is a problem with your scoby, just continue brewing batches but discard the kombucha they make. If there's a problem, it will get worse over time and become very apparent. If it's just a natural aspect of the scoby, then it will stay consistent from batch to batch and the kombucha is fine for drinking.

https://www.thekitchn.com/how-to-make-kombucha-tea-at-home-cooking-lessons-from-the-kitchn-173858

How To Make Kombucha Tea at Home

MAKES

about 1 gallon/3.79 liter

There are 4.55 Litres in 1 UK Gallon.


INGREDIENTS

  • 3 1/2 quarts water/A quart and a liter are similar in size/UK 1136.52 mL
  • 1 cup sugar (regular granulated sugar works best)
  • 8 bags black tea, green tea, or a mix (or 2 tablespoons loose tea)
  • 2 cups starter tea from last batch of kombucha or store-bought kombucha (unpasteurized, neutral-flavored)
  • 1 scoby per fermentation jar, homemade or purchased online

OPTIONAL FLAVORING EXTRAS FOR BOTTLING

  • 1 to 2 cups chopped fruit
  • 2 to 3 cups fruit juice
  • 1 to 2 tablespoons flavored tea (like hibiscus or Earl Grey)
  • 1/4 cup honey
  • 2 to 4 tablespoons fresh herbs or spices

EQUIPMENT

  • Stock pot
  • 1-gallon glass jar/3.7L or two 2-quart glass jars
  • Tightly woven cloth (like clean napkins or tea towels), coffee filters, or paper towels, to cover the jar
  • Bottles: Six 16-oz/473 mL glass bottles with plastic lids, swing-top bottles, or clean soda bottles
  • Small funnel

INSTRUCTIONS

  • Note: Avoid prolonged contact between the kombucha and metal both during and after brewing. This can affect the flavor of your kombucha and weaken the scoby over time.
  • 1. Make the tea base: 
  • Bring the water to a boil. 
  • Remove from heat and stir in the sugar to dissolve. Drop in the tea and allow it to steep until the water has cooled. Depending on the size of your pot, this will take a few hours. You can speed up the cooling process by placing the pot in an ice bath.
  • 2. Add the starter tea: Once the tea is cool, remove the tea bags or strain out the loose tea. Stir in the starter tea. (The starter tea makes the liquid acidic, which prevents unfriendly bacteria from taking up residence in the first few days of fermentation.)
  • 3. Transfer to jars and add the scoby: Pour the mixture into a 1-gallon glass jar (or divide between two 2-quart jars, in which case you'll need 2 scobys) and gently slide the scoby into the jar with clean hands. Cover the mouth of the jar with a few layers tightly-woven cloth, coffee filters, or paper towels secured with a rubber band. (If you develop problems with gnats or fruit flies, use a tightly woven cloth or paper towels, which will do a better job keeping the insects out of your brew.)
  • Ferment for 7 to 10 days: Keep the jar at room temperature, out of direct sunlight, and where it won't get jostled. Ferment for 7 to 10 days, checking the kombucha and the scoby periodically.
  • It's not unusual for the scoby to float at the top, bottom, or even sideways during fermentation. A new cream-colored layer of scoby should start forming on the surface of the kombucha within a few days. It usually attaches to the old scoby, but it's ok if they separate. You may also see brown stringy bits floating beneath the scoby, sediment collecting at the bottom, and bubbles collecting around the scoby. This is all normal and signs of healthy fermentation.
  • After 7 days, begin tasting the kombucha daily by pouring a little out of the jar and into a cup. When it reaches a balance of sweetness and tartness that is pleasant to you, the kombucha is ready to bottle.
  • Remove the scoby: Before proceeding, prepare and cool another pot of strong tea for your next batch of kombucha, as outlined above. With clean hands, gently lift the scoby out of the kombucha and set it on a clean plate. As you do, check it over and remove the bottom layer if the scoby is getting very thick.
  • Bottle the finished kombucha: Measure out your starter tea from this batch of kombucha and set it aside for the next batch. Pour the fermented kombucha (straining, if desired) into bottles using the small funnel, along with any juice, herbs, or fruit you may want to use as flavoring. Leave about a half inch of head room in each bottle. (Alternatively, infuse the kombucha with flavorings for a day or two in another covered jar, strain, and then bottle. This makes a cleaner kombucha without "stuff" in it.)
  • Carbonate and refrigerate the finished kombucha: Store the bottled kombucha at room temperature out of direct sunlight and allow 1 to 3 days for the kombucha to carbonate. Until you get a feel for how quickly your kombucha carbonates, it's helpful to keep it in plastic bottles; the kombucha is carbonated when the bottles feel rock solid. Refrigerate to stop fermentation and carbonation, and then consume your kombucha within a month.
  • Make a fresh batch of kombucha: Clean the jar being used for kombucha fermentation. Combine the starter tea from your last batch of kombucha with the fresh batch of sugary tea, and pour it into the fermentation jar. Slide the scoby on top, cover, and ferment for 7 to 10 days.

RECIPE NOTES

  • Covering for the jar: Cheesecloth is not ideal because it's easy for small insects, like fruit flies, to wiggle through the layers. Use a few layers of tightly woven cloth (like clean napkins or tea towels), coffee filters, or paper towels, to cover the jar, and secure it tightly with rubber bands or twine.
  • Batch Size: To increase or decrease the amount of kombucha you make, maintain the basic ratio of 1 cup of sugar, 8 bags of tea, and 2 cups starter tea per gallon batch. One scoby will ferment any size batch, though larger batches may take longer.
  • Putting Kombucha on Pause: If you'll be away for 3 weeks or less, just make a fresh batch and leave it on your counter. It will likely be too vinegary to drink by the time you get back, but the scoby will be fine. For longer breaks, store the scoby in a fresh batch of the tea base with starter tea in the fridge. Change out the tea for a fresh batch every 4 to 6 weeks.
  • Other Tea Options: Black tea tends to be the easiest and most reliable for the scoby to ferment into kombucha, but once your scoby is going strong, you can try branching out into other kinds. Green tea, white tea, oolong tea, or a even mix of these make especially good kombucha. Herbal teas are okay, but be sure to use at least a few bags of black tea in the mix to make sure the scoby is getting all the nutrients it needs. Avoid any teas that contain oils, like earl grey or flavored teas.
  • Avoid Prolonged Contact with Metal: Using metal utensils is generally fine, but avoid fermenting or bottling the kombucha in anything that brings them into contact with metal. Metals, especially reactive metals like aluminum, can give the kombucha a metallic flavor and weaken the scoby over time.

Troubleshooting Kombucha

  • It is normal for the scoby to float on the top, bottom, or sideways in the jar. It is also normal for brown strings to form below the scoby or to collect on the bottom. If your scoby develops a hole, bumps, dried patches, darker brown patches, or clear jelly-like patches, it is still fine to use. Usually these are all indicative of changes in the environment of your kitchen and not a problem with the scoby itself.
  • Kombucha will start off with a neutral aroma and then smell progressively more vinegary as brewing progresses. If it starts to smell cheesy, rotten, or otherwise unpleasant, this is a sign that something has gone wrong. If you see no signs of mold on the scoby, discard the liquid and begin again with fresh tea. If you do see signs of mold, discard both the scoby and the liquid and begin again with new ingredients.
  • A scoby will last a very long time, but it's not indestructible. If the scoby becomes black, that is a sign that it has passed its lifespan. If it develops green or black mold, it is has become infected. In both of these cases, throw away the scoby and begin again.
  • To prolong the life and maintain the health of your scoby, stick to the ratio of sugar, tea, starter tea, and water outlined in the recipe. You should also peel off the bottom (oldest) layer every few batches. This can be discarded, composted, used to start a new batch of kombucha, or given to a friend to start their own.
  • If you're ever in doubt about whether there is a problem with your scoby, just continue brewing batches but discard the kombucha they make. If there's a problem, it will get worse over time and become very apparent. If it's just a natural aspect of the scoby, then it will stay consistent from batch to batch and the kombucha is fine for drinking.

https://www.thekitchn.com/how-to-make-kombucha-tea-at-home-cooking-lessons-from-the-kitchn-173858

Saturday, 9 September 2023

Easy refrigerator picles.

 Peel cucumbers from seeds and skin and cut as in the picture


To make a simple and tasty brine solution, mix

1 cup of vinegar, 1 cup of water, 1 tablespoon of salt, and 6 tablespoons of sugar.

Add 3 cloves of garlic, 2 teaspoons of peppercorn, a pinch of red pepper, dill, and bay leaves.

Poor warm brine.

Refrigerate and enjoy up to two months

https://youtu.be/_2u-dO2-DHU?t=476

/Fatima the 'Home Freshalicious' in the Pacific Northwest of the United States, but originally grew up in Brazil./

Easy refrigerator picles.

 Peel cucumbers from seeds and skin and cut as in the picture


To make a simple and tasty brine solution, mix

1 cup of vinegar, 1 cup of water, 1 tablespoon of salt, and 6 tablespoons of sugar.

Add 3 cloves of garlic, 2 teaspoons of peppercorn, a pinch of red pepper, dill, and bay leaves.

Poor warm brine.

Refrigerate and enjoy up to two months

https://youtu.be/_2u-dO2-DHU?t=476

/Fatima the 'Home Freshalicious' in the Pacific Northwest of the United States, but originally grew up in Brazil./

Thursday, 7 September 2023

Chicken Soup

from Anne Skoogh

Serves 4
based om a recipe from Home Made by Tana Ramsay

1 fairly small chicken (about 1 kg/2 lb)
1 carrot, peeled and cut into smaller pieces
1 large leek, white part only, sliced
2 yellow onions, chopped
2 bay leaves
6 black peppercorns
1-2 tsp dried tarragon
50 g butter
2 tbsp flour
100 ml heavy cream (double cream)
1 tbsp dry sherry or cognac
salt

Place the chicken, breast up, in a pot with the carrot and half of the chopped onions and leek. 
Add bay leaves, peppercorns, tarragon and a pinch of salt. Pour in enough water to almost cover the chicken, but let the top part of the breast be above water so it will steam. (This prevents it from becoming too dry.) Bring to a boil, lower the heat and cover with a lid. Simmer on low heat for about 1,5 hours.

Remove the chicken, and let it cool until you can easily shred the meat into small pieces. Sieve the boiling liquid into a saucepan and let it reduce until you have about one litre.

Melt the butter in a large saucepan, and fry the remaining leek and onion until softened but don't let it color. Add the flour and stir really well to make a paste. Slowly add the boiling liquid from the chicken, a little at a time, and whisk well. When it's all added, bring to a boil, lower the heat and let it cook for about ten minutes. Use a handheld mixer or a blender to liquidize the soup.

Add the cream, sherry (or cognac) and finally the shredded chicken. Season with salt.

Chicken Soup

from Anne Skoogh

Serves 4
based om a recipe from Home Made by Tana Ramsay

1 fairly small chicken (about 1 kg/2 lb)
1 carrot, peeled and cut into smaller pieces
1 large leek, white part only, sliced
2 yellow onions, chopped
2 bay leaves
6 black peppercorns
1-2 tsp dried tarragon
50 g butter
2 tbsp flour
100 ml heavy cream (double cream)
1 tbsp dry sherry or cognac
salt

Place the chicken, breast up, in a pot with the carrot and half of the chopped onions and leek. 
Add bay leaves, peppercorns, tarragon and a pinch of salt. Pour in enough water to almost cover the chicken, but let the top part of the breast be above water so it will steam. (This prevents it from becoming too dry.) Bring to a boil, lower the heat and cover with a lid. Simmer on low heat for about 1,5 hours.

Remove the chicken, and let it cool until you can easily shred the meat into small pieces. Sieve the boiling liquid into a saucepan and let it reduce until you have about one litre.

Melt the butter in a large saucepan, and fry the remaining leek and onion until softened but don't let it color. Add the flour and stir really well to make a paste. Slowly add the boiling liquid from the chicken, a little at a time, and whisk well. When it's all added, bring to a boil, lower the heat and let it cook for about ten minutes. Use a handheld mixer or a blender to liquidize the soup.

Add the cream, sherry (or cognac) and finally the shredded chicken. Season with salt.

Thursday, 6 April 2023

Carrot Salad with Harissa, Feta and Mint

Adapted a bit from a reader, who adapted it from her mother, who adapted, most likely, she said, from Cuisine Magazine

3/4 pound carrots, peeled, trimmed and coarsely grated
4 tablespoons olive oil
1 crushed clove of garlic
1/2 teaspoon caraway seeds or about half as much, ground (I used seeds but ground them first)
3/4 teaspoon cumin seeds or about half as much, ground (I used the seed but ground them first, again)
1/2 teaspoon paprika
3/4 teaspoon harissa (for a solid kick of heat; adjust yours to taste, and to the heat level of your harissa)
1/2 teaspoon sugar
3 tablespoons lemon juice
2 tablespoons flat leaf parsley, finely chopped
2 tablespoons fresh mint, finely chopped
100 grams feta, crumbled or chopped into bits

In a small sauté pan, cook the garlic, caraway, cumin, paprika, harissa and sugar in the oil until fragrant, about one to two minutes. Remove from heat and add the lemon juice and a pinch of salt. Pour over the carrots and mix. Add the herbs and mix. Leave to infuse for an hour and add the feta before eating. With a fork.

Harissa: Is a North African chile paste that has become so popular, we were tickled to find it all over tables in Paris two years ago, right next to the Dijon mustard. There is almost nothing it doesn’t make more delicious: eggs, potatoes, stews, couscous, sandwiches and more, and there are almost as many recipes as there are people who consume it. Most boil down to hot chiles ground with garlic, cumin, coriander, caraway and olive oil, often with a smidge of sundried tomatoes. You can make your own (I’ve been eying this recipe for some time) or you can buy some (I brought home this brand, which we love). The adavantage of making your own, as always, is that you can adjust the recipe to suit your tastes and desired level of heat.

Carrot Salad with Harissa, Feta and Mint

Adapted a bit from a reader, who adapted it from her mother, who adapted, most likely, she said, from Cuisine Magazine

3/4 pound carrots, peeled, trimmed and coarsely grated
4 tablespoons olive oil
1 crushed clove of garlic
1/2 teaspoon caraway seeds or about half as much, ground (I used seeds but ground them first)
3/4 teaspoon cumin seeds or about half as much, ground (I used the seed but ground them first, again)
1/2 teaspoon paprika
3/4 teaspoon harissa (for a solid kick of heat; adjust yours to taste, and to the heat level of your harissa)
1/2 teaspoon sugar
3 tablespoons lemon juice
2 tablespoons flat leaf parsley, finely chopped
2 tablespoons fresh mint, finely chopped
100 grams feta, crumbled or chopped into bits

In a small sauté pan, cook the garlic, caraway, cumin, paprika, harissa and sugar in the oil until fragrant, about one to two minutes. Remove from heat and add the lemon juice and a pinch of salt. Pour over the carrots and mix. Add the herbs and mix. Leave to infuse for an hour and add the feta before eating. With a fork.

Harissa: Is a North African chile paste that has become so popular, we were tickled to find it all over tables in Paris two years ago, right next to the Dijon mustard. There is almost nothing it doesn’t make more delicious: eggs, potatoes, stews, couscous, sandwiches and more, and there are almost as many recipes as there are people who consume it. Most boil down to hot chiles ground with garlic, cumin, coriander, caraway and olive oil, often with a smidge of sundried tomatoes. You can make your own (I’ve been eying this recipe for some time) or you can buy some (I brought home this brand, which we love). The adavantage of making your own, as always, is that you can adjust the recipe to suit your tastes and desired level of heat.

Sunday, 2 April 2023

Переезд

Переезд

Классифицируйте свои вещи по типу объекта, чтобы сэкономить время и пространство во время переезда

Само собой разумеется, что это первый шаг в любом переезде, однако не всегда ясно, как пройти этот процесс. Одна из формул, которая обычно работает, заключается в том, чтобы следовать порядку, который определяется количеством комнат в доме или офисе, который вы покидаете. Из каждой комнаты вы выбираете вещи, которые хотите переместить в новое пространство, и удаляете их в зависимости от того, полезны они в этом месте или нет. Желательно сделать три раунда, первый, в котором вы удаляете, например, мелкие предметы на кухне, которые вы больше не будете использовать, пока не уйдете, второй раунд, примерно за неделю до переезда, в котором вы удаляете электроприборы, которые вы можете утилизировать в течение нескольких дней, и, наконец, за несколько дней до переезда, в котором Таким образом, также организована уборка пространства, от самых маленьких до самых больших углов.

Метод, который мы упомянули выше, значительно облегчает упаковку, так как вы начнете с создания небольших пакетов, которые не будут препятствовать вашей мобильности из-за пространства, и вы убедитесь, что не забудете все, что вам нужно. Что касается того, как разместить пакеты дома, мы рекомендуем вам оставить каждую коробку в своей комнате и открыть ее не менее недели, в течение которой вы будете добавлять вещи. Это также позволяет избежать блокировки пространств в доме, и вам нужно будет зарезервировать только одно место в каждой комнате. 

Переезд

Переезд

Классифицируйте свои вещи по типу объекта, чтобы сэкономить время и пространство во время переезда

Само собой разумеется, что это первый шаг в любом переезде, однако не всегда ясно, как пройти этот процесс. Одна из формул, которая обычно работает, заключается в том, чтобы следовать порядку, который определяется количеством комнат в доме или офисе, который вы покидаете. Из каждой комнаты вы выбираете вещи, которые хотите переместить в новое пространство, и удаляете их в зависимости от того, полезны они в этом месте или нет. Желательно сделать три раунда, первый, в котором вы удаляете, например, мелкие предметы на кухне, которые вы больше не будете использовать, пока не уйдете, второй раунд, примерно за неделю до переезда, в котором вы удаляете электроприборы, которые вы можете утилизировать в течение нескольких дней, и, наконец, за несколько дней до переезда, в котором Таким образом, также организована уборка пространства, от самых маленьких до самых больших углов.

Метод, который мы упомянули выше, значительно облегчает упаковку, так как вы начнете с создания небольших пакетов, которые не будут препятствовать вашей мобильности из-за пространства, и вы убедитесь, что не забудете все, что вам нужно. Что касается того, как разместить пакеты дома, мы рекомендуем вам оставить каждую коробку в своей комнате и открыть ее не менее недели, в течение которой вы будете добавлять вещи. Это также позволяет избежать блокировки пространств в доме, и вам нужно будет зарезервировать только одно место в каждой комнате. 

Friday, 24 March 2023

Краснокочанная капуста по-чешски


красная капуста по-чешски

Один мой чешский знакомый как-то сказал, что красную капусту в Чехии едят в основном только старики и туристы в качестве гарнира к утке или гусю. 

Мне это показалось весьма странным. Ведь все мои знакомые, бывавшие в Чехии, неизменно восторгаются этой капустой, да и сама я, чего уж греха таить, буквально влюбилась в это блюдо с первой вилочки. Серьезно, как можно ее не любить?

Я очень надеялась, что хотя бы в одной из двух моих чешских книжек окажется рецепт этого замечательного гарнира. Отдельным блюдом я ее не нашла и уже была практически готова расстроиться, как вдруг…нашла ее в составе другого блюда. Попробовала — да, это она. А рецепт оказался настолько простым, как и все гениальное:)

Конечно, я видела варианты и с вином, и с апельсинами, и с корицей (уже вольности такие). Все они, я уверена, прекрасны по-своему. А я вот поделюсь традиционным рецептом из продуктов, которые наверняка найдутся в каждом доме, но вместе на минутку заставят вас либо поностальгировать по Чехии, либо представить себя в чешской пивнице.

Традиционные личные замечания и наблюдения:

Привожу идеальные пропорции, чтобы получить сбалансированный вкус. Небольшие отклонения не испортят блюда, но старайтесь готовить как можно ближе к рецепту.

Лучше всего это блюдо подходит как гарнир к птице (особенно гусям, уткам и дичи). Впрочем, можете попробовать подать с мясом.

Можно не бояться сделать слишком много. Блюдо довольно долго не портится.


Нам понадобится (на 6-8 порций):

Краснокочанная капуста800 г
Лук1 шт
Уксус100 мл
Сахар3 ст.л.
Тминхорошая щепотка
Мука грубого помола1 ст.л.
Сольщепотка
Жир*2 ст.л.

*Лучше взять утиный или гусиный, но подойдет и свиной


Сложность☆☆☆☆☆
Время1 час 10 минут
Стоимость47 рублей
Кухня Чешская

Источник: R. Vaněk, Poklady klasické české kuchyně


Приготовление:
1. 
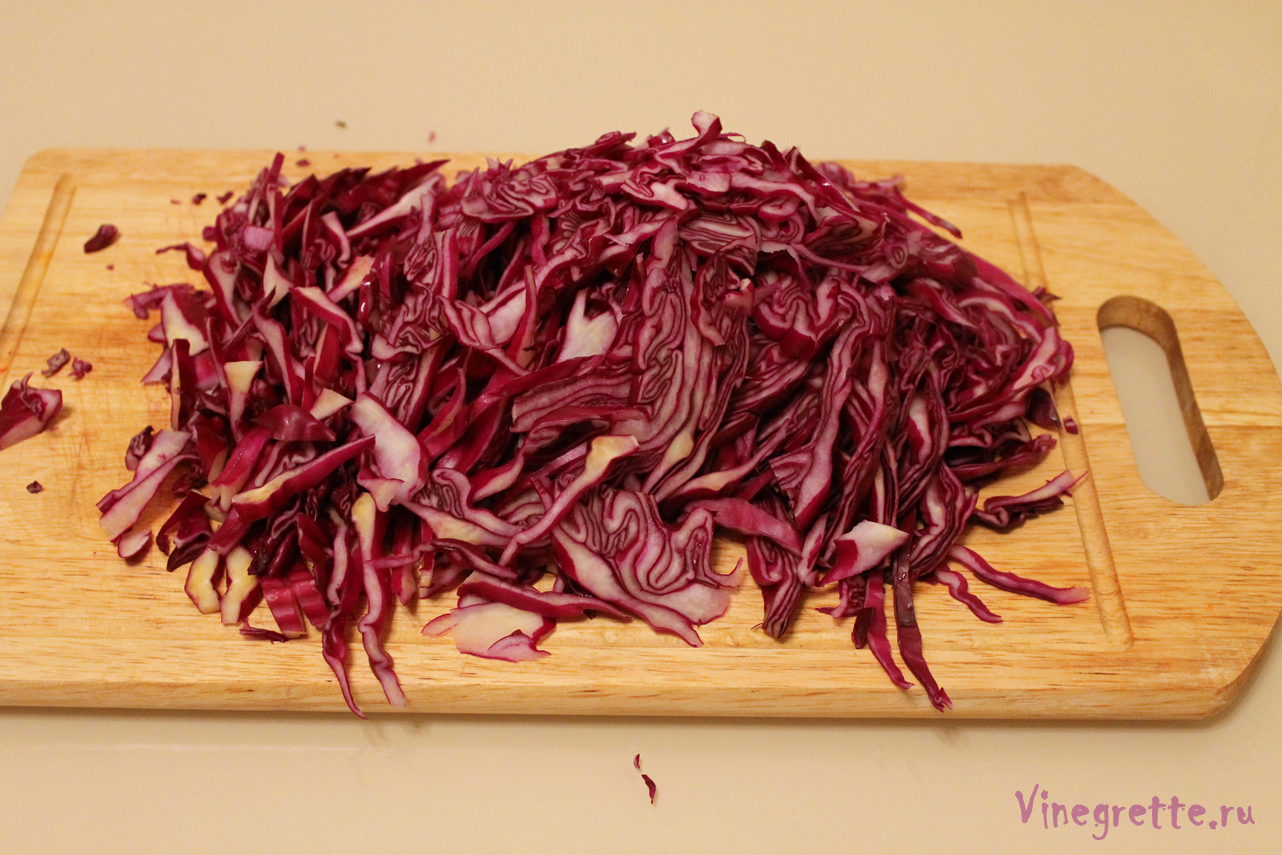
Капусту моем, разрезаем на 2 части и шинкуем. Старайтесь, чтобы «соломка» выходила шириной 3-4 мм.

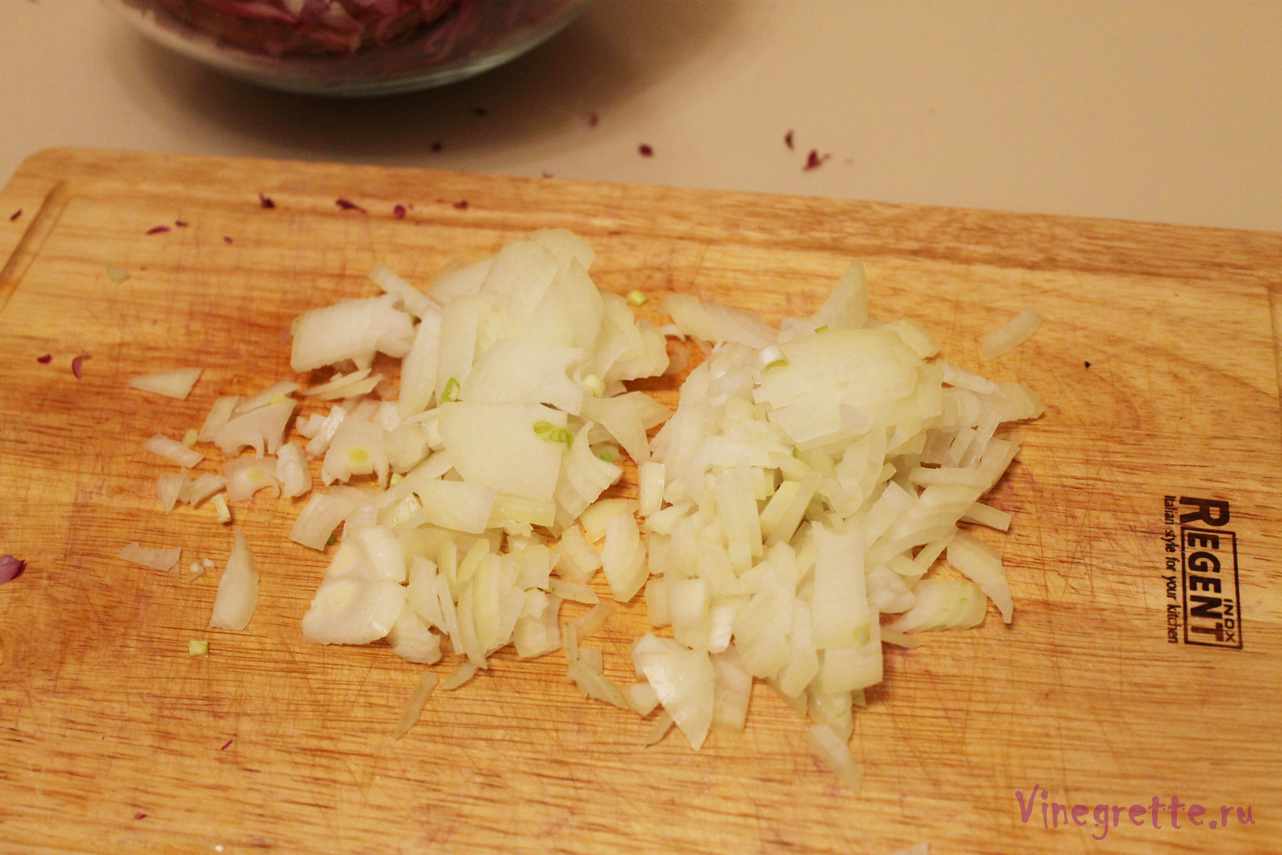
kapusta_012. Луковицу чистим и мелко нарезаем.

kapusta_02
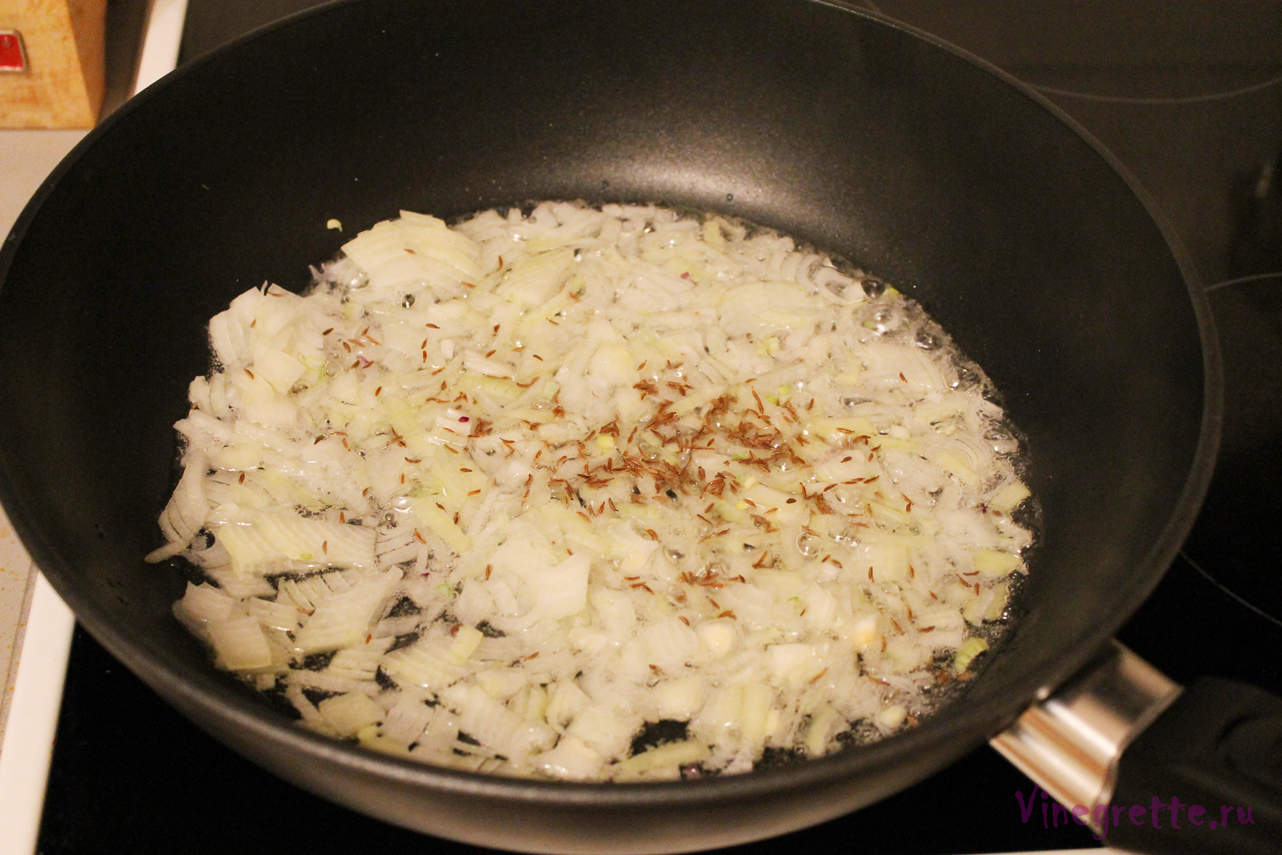
3. В глубокой кастрюле или сотейнике растапливаем жир и нагреваем его. Добавляем нарезанный лук и тмин и обжариваем до золотистого цвета.

kapusta_04
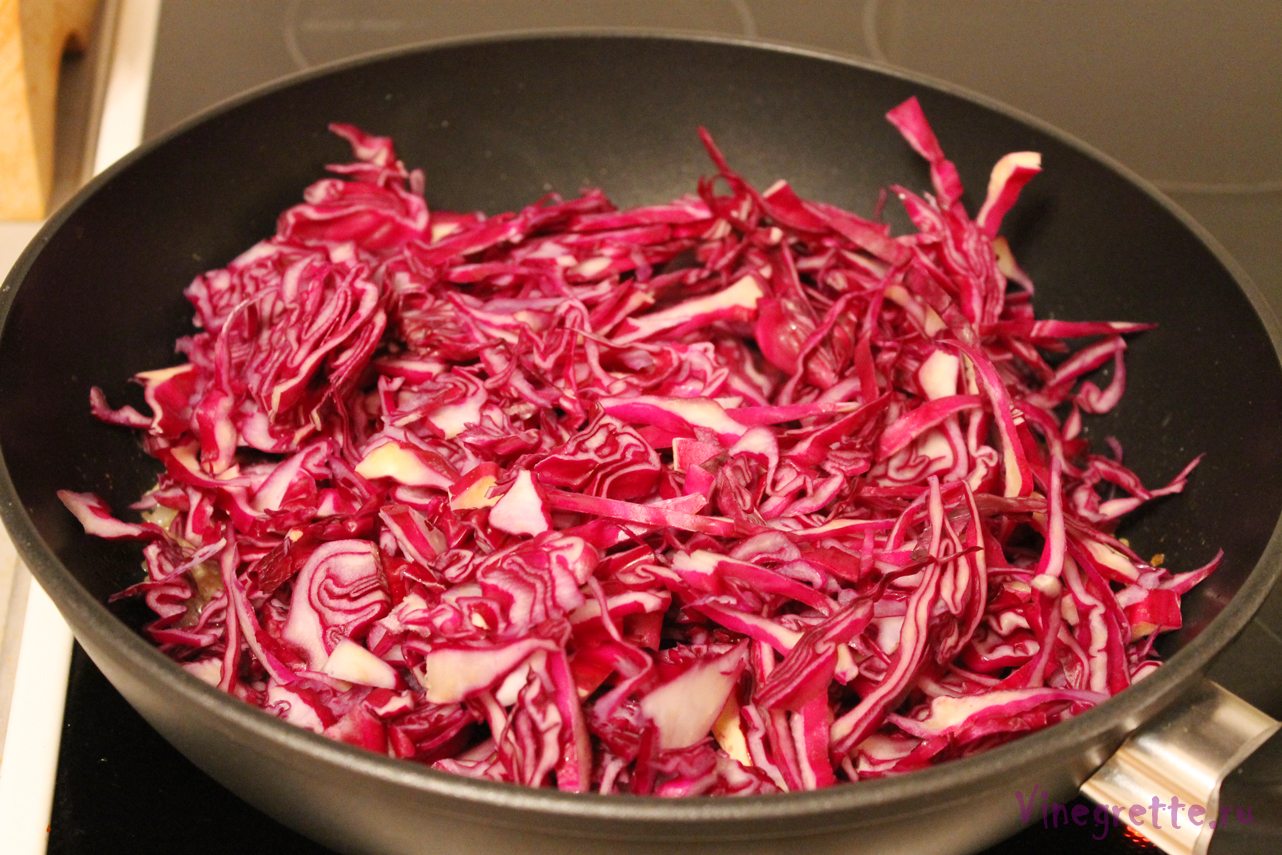
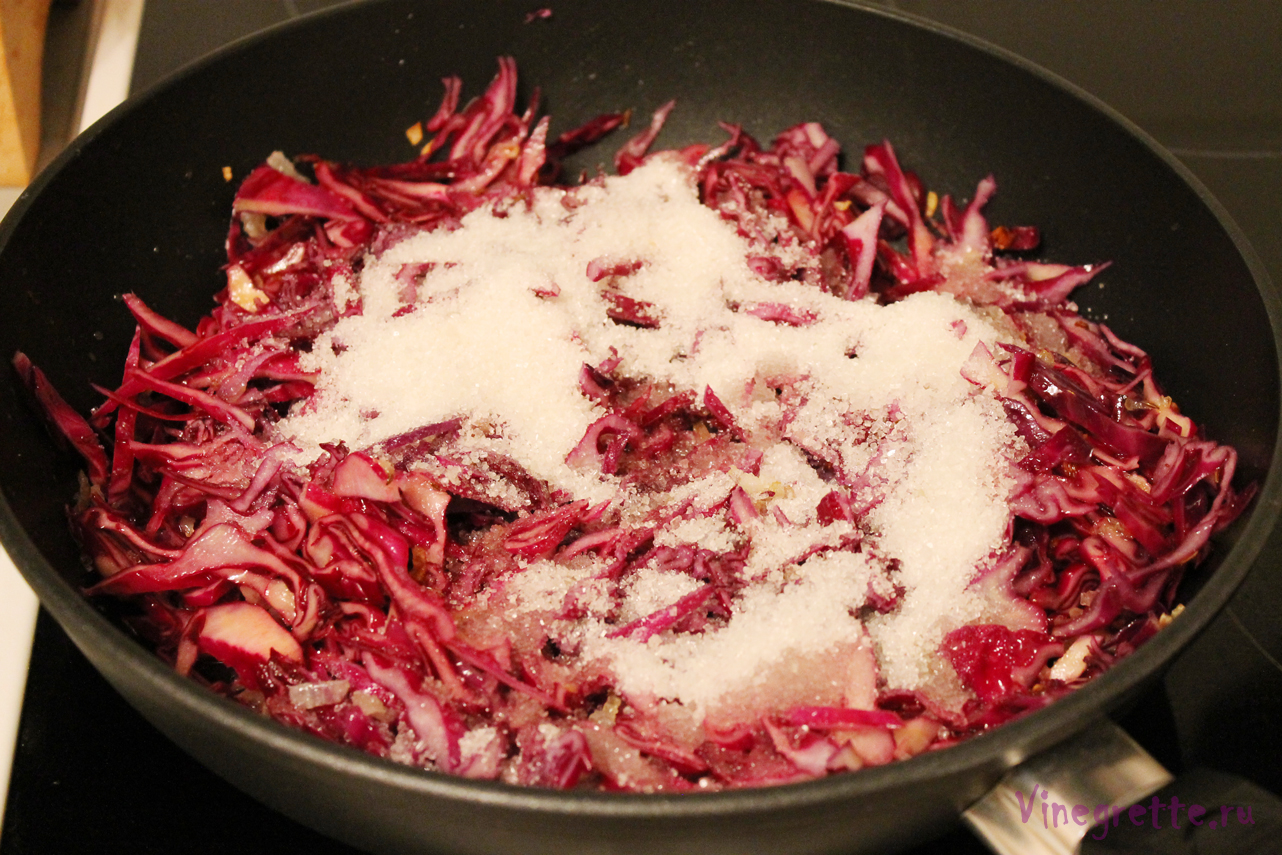
4. Выкладываем капусту, солим ее, добавляем уксус и сахар, перемешиваем, накрываем крышкой и оставляем тушиться на медленном огне.

kapusta_05

kapusta_06
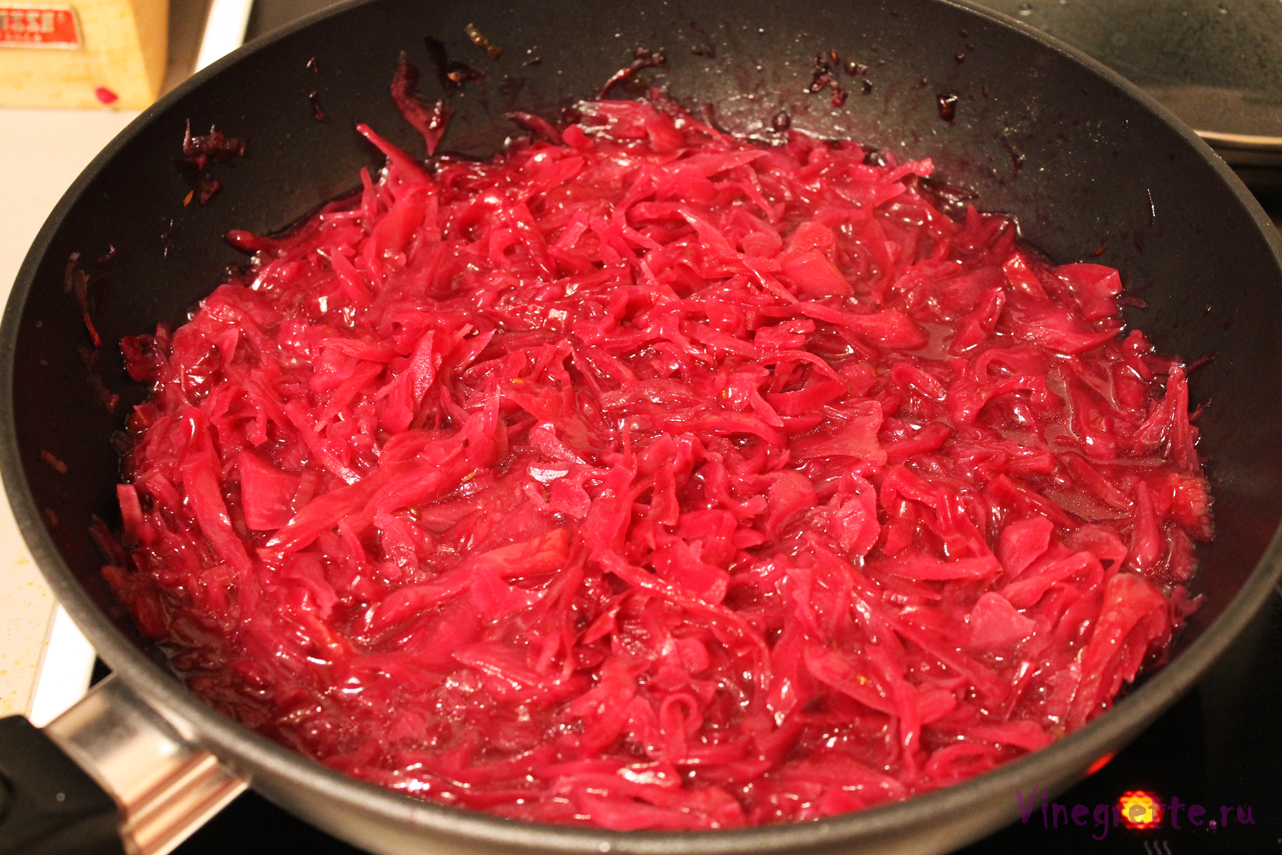
5. Периодически заглядываем в кастрюлю и помешиваем капусту. Нельзя допускать, чтобы жидкость выкипела, поэтому подливаем воду по мере необходимости. Слой жидкости на дне должен быть примерно высотой с одну фалангу пальца. Тушим таким образом до мягкости капусты (30-40 минут).


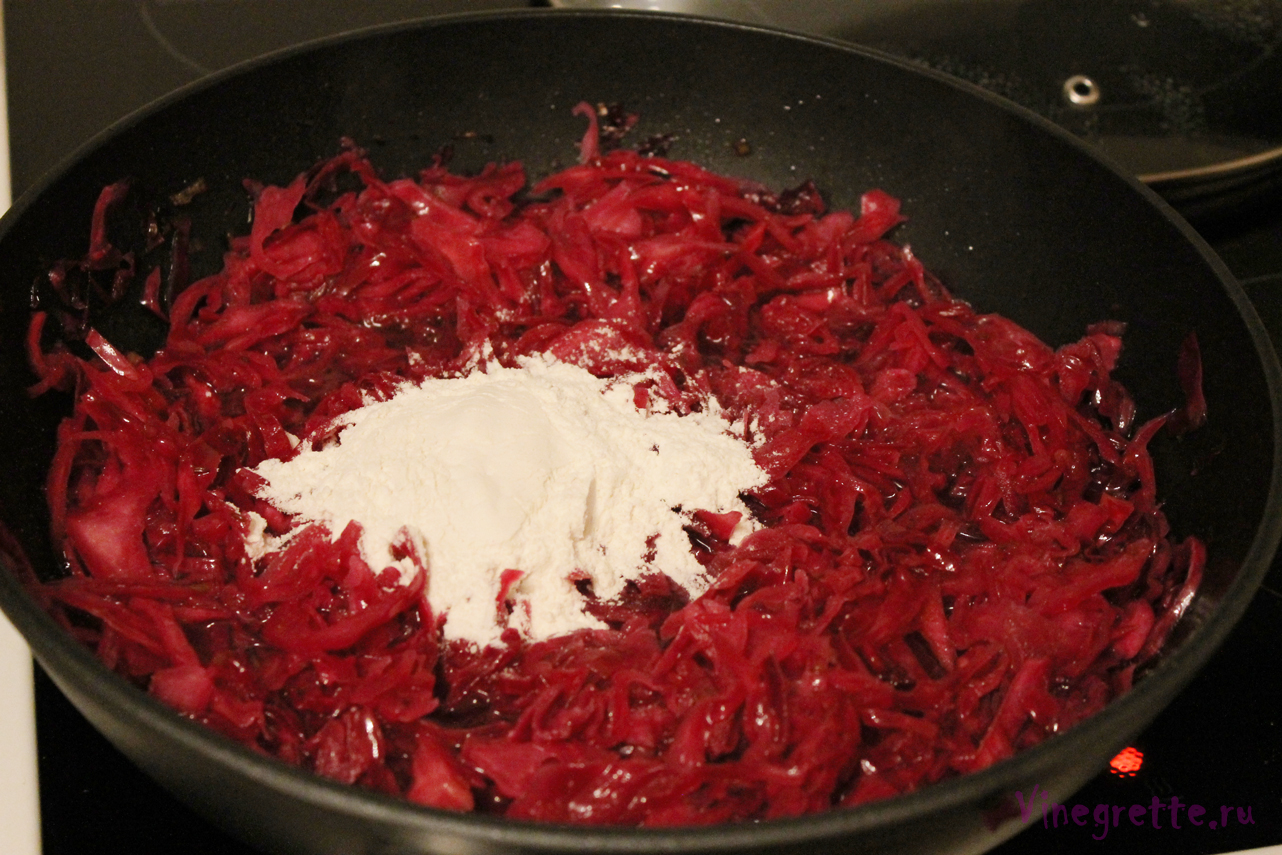
6. Когда капуста почти готова, добавляем муку, перемешиваем и даем потушиться еще 10-15 минут. Это немного загустит жидкость.


kapusta_07

kapusta_08
7. Подаем в качестве гарнира к птице. Хороша в любом виде, хоть горячая, хоть остывшая:)
cervene zeli_00

Dobrou chut’!